Pages

Related Posts Plugin for WordPress, Blogger...
Showing posts with label recipe. Show all posts

Wednesday, January 18, 2017

Chinese Almond Cookie Recipe

chinese almond cookies, cookies, cookie recipe, chinese new year

Growing up, one of my favorite snacks to get at the Asian market were Twin Dragon Almond Cookies. It might have been the pink box that first caught my eye but I was hooked on those crunchy cookies and could never stop at just one. Even now whenever I see that pink box at the store, it's hard to resist the tempation. For Chinese New Year, I decided to make my own Chinese Almond Cookies using a recipe from Table for Two. The chewy texture and freshness of these homemade cookies make them so much better than the store bought ones. I recommend snacking on these cookies with a hot cup of green tea. Happy Year of the Rooster to all my readers! I wish you a year of prosperity, peace and  happy snacking.


chinese almond cookies, cookies, cookie recipe, chinese new year

chinese almond cookies, cookies, cookie recipe, chinese new year

chinese almond cookies, cookies, cookie recipe, chinese new year

chinese almond cookies, cookies, cookie recipe, chinese new year

chinese almond cookies, cookies, cookie recipe, chinese new year

Chinese Almond Cookies

Original recipe by Table for Two 

Ingredients
1 1/3 cups of almond flour
2 sticks (1 cup) of unsalted butter, cubed
Pinch of kosher salt
2 eggs
1 tsp almond extract
1 3/4 cups of all-purpose flour
1 cup + 2 tablespoons of granulated sugar
1/2 teaspoon of baking soda
Sliced almonds

Instructions
1. Combine almond flour, butter and salt in stand mixer using paddle attachment.
2. Add one egg and almond extract. Beat together until incorporated.
3. In medium bowl, whisk together flour, sugar and baking soda. Slowly add to stand mixer until just combined.
4. Form dough into a disc, wrap in saran wrap, and refrigerate for 2 hours.
5. Preheat oven to 325 degrees.
6. Beat remaining egg in small bowl and have brush ready.
7. Form dough into 1 inch balls and press flat in hands to form half inch thick disc.
8. Place on cookie sheet 1 inch apart. Brush tops of cookies with egg wash and press an almond slice onto the center of each. You can also make a design out of the almond slices if you want to be fancy!
8. Bake for 20 minutes or until cookies turn a dark golden yellow color.
9. Remove and let cool on baking sheets before transferring to cooling racks.
10. Cookies can be stored for up to 2 weeks.

Tuesday, September 22, 2015

Guinness Bacon Beer Nuts Game Day Snack Recipe

Football season has officially started and I'm really looking forward to all the get-togethers we will be having with family and friends over the next few months to cheer on our favorite teams. While I'm not the biggest football fan, I am a fan of game day food. Pizza? Yes! Meat on the grill? Yes! Chips? Yes! While all these foods are fun to eat, they are generally not good for your waistline. In an effort to keep everyone slim and sexy this football season, here is a recipe for Guinness Bacon Beer Nuts. These nuts are sure to be a game day hit. They are crunchy, sweet, salty and the Guinness gives them a slight bitter beer finish. You know what else is great? Being able to barrage your husband with inappropriate nut jokes while you make this snack!


Guinness Bacon Beer Nuts
Original recipe from Mantitlement

Ingredients:
- 4 1/2 cups of roasted nuts (about 1 1/2 lbs)
- 6 strips of bacon
- 1 cup of Guinness
- 1/2 teaspoon salt
- 1 cup brown sugar
- 2 tablespoons bacon grease

Instructions:
- Preheat oven to 350 degrees.
- Cook bacon until crispy. Remove and drain. Save the bacon grease.
- Finely chop bacon once it cools. I chopped mine very fine so it almost looked more like bacon sprinkles.
- Combine Guinness, brown sugar, salt and bacon grease in medium pot. Bring to a boil and then reduce heat to medium and cook down for 15-20 minutes. Stir often to avoid burning your sugar.
- Add bacon to glaze.
- Place nuts in a large bowl and pour glaze on top. Stir gently until all the nuts are lightly coated.
- Bake for 20 minutes. Remove from oven and let cool.
- Break into pieces and store in air tight container.


That's it! Just 6 ingredients. This snack is easy to whip up and will keep for up to a week. For more healthy snacking ideas, visit Nuts.com. Go Chargers!

Friday, September 26, 2014

Foodie Friday: Tried and True Oven Braised Lemon Chicken Recipe

I found this recipe for lemon chicken back in 2011 and always go back to it whenever I have a craving for lemon chicken. It's a proven crowd pleaser, easy to make and easy to clean up because it only requires one pot. Thanks a million times over to The Culinary Chronicles for sharing this recipe with the interwebz so many years ago.


[Mouthwatering photo from The Culinary Chronicles]


Oven Braised Lemon Chicken
Serves 4 very hungry people

Ingredients
8 Pieces of bone-in chicken (I used thighs and drumsticks)
6 Garlic cloves
1 Small onion, thinly sliced
2 Cups crimini mushrooms, sliced
4 Sprigs of fresh rosemary
8 Lemon slices
1 Dried bay leaf
2 Tablespoons of capers, drained
2 Cups of low sodium chicken broth
1/2 Teaspoon of red chili flakes
3 Tablespoons of olive oil
Kosher salt and black pepper


Directions
1. Preheat oven to 350 degrees.
2. Generously season chicken with salt and pepper.


3. Heat olive oil on medium high in large dutch oven. Brown chicken in batches and transfer to plate. Discard all but 2-3 tablespoons of leftover grease.


4. Lower heat to medium and add garlic cloves, cooking until lightly golden. Add onions and cook until evenly browned. Add chili flakes and saute for 1 minute. Add mushrooms and saute for 2-3 minutes.


5. Add chicken stock and bring to a boil.
6. Return chicken to the pot with skin side up.
7. Add lemon slices, bay leaf, capers and rosemary sprigs, submerging them underneath the liquid.


8. Place lid on the pot and put it in the oven for 35-40 minutes or until chicken is cooked through.

9. Take the pot out of the oven. Remove rosemary, bay leaf and skim off fat or impurities. Season with salt and pepper as desired.


10. Plate chicken and serve with fresh bread or other sides.

I hope you enjoy this recipe as much as I do! It's a hearty meal that will fill your belly with happiness.

Tuesday, January 7, 2014

Vietnamese Sesame Ball Recipe with Pictures


Cooking Vietnamese food terrifies me. First of all, you know it's never going to taste as good as your mom's/grandma's. Second of all, the best recipes are "by taste" and neither my mom or Tuan's mom bother measuring with anything other than a pho spoon or rice bowl. Daunting right?
 
On New Years, my friend Casey came over armed with this recipe for sesame balls from the Ravenous Couple and all the ingredients needed to make these delicious balls of goodness. With the help of youtube, we managed to make our first batch and it turned out relatively well. Go grab your apron, I'm about to take you through the process.
 
 
Vietnamese Sesame Balls (Banh Cam)
recipe adapted from the Ravenous Couple
 
Ingredients
 
Filling
8 oz split peeled mung beans
1 cup sugar
1/2 cup warm water
3/4 cup unsweetened shredded coconut
 
Dough
2 1/2 cups water
1 1/2 cup sugar
16 oz bag glutinous rice flour
1 cup rice flour
2 tbs baking powder
2/3 cup mash potato flakes
 
Directions
 
Filling
1. Soak mung beans for 1 hour in warm water.
2. Steam until softened and easily smashed between finger tips (roughly 30 mins).
3. Dissolve sugar in  warm water.
4. Transfer cooled mung beans to mixing bowl and mash coarsely.
5. Add water sugar mix and coconut to mung beans and mix well. The texture should be like mashed potatoes.
6. Allow to cool and form into quarter size balls of mung bean. I put the mix into the fridge to speed up the cooling process.
 
Dough
1. Dissolve sugar in warm water.
2. In large mixing bowl, combine sugar water mix with potato flakes and stir to dissolve.
3. Add baking powder and stir to dissolve.
4. Add the two types of rice flour and mix together with hands to form a ball of dough. The dough should be wet play-dough consistency.
5. If the dough is too dry, add an extra 1/4 cup of water at a time until you reach the desired consistency.
6. Pinch off a golf ball sized piece of dough and form it into a ball. Flatten to a disk with the palm of your hands and thin out the edges to form a pancake. If the dough cracks at the edges it's too dry and you need to add more water.
7. Place filling in the center and fold dough edges together and seal seams by rough in the palm of your hands.
8. Rolls in a bowl of sesame seeds to cover immediately. Waiting to do this process will result in the dough drying out, making it difficult for the seeds to stick to the ball.
9. Cover loosely at room temperature and allow to rest for 1 hour.
10. After balls have rested, fry at 325 until balls are golden brown.
11. Remove from oil, drain and enjoy!


[Golden sesame balls!]
 
 
[Rolling the mung bean filling. Make sure it is completely cooled or you won't be able to form the balls. The size of your final sesame ball will depend on the size of your filling. I like mine on the smaller side so we made the filling balls smaller.]

 
[Mixing the dough by hand]

 
[Pinch off a piece to check the consistency of your dough]


[Parker watching me wrap the dough around the filling]

 
[It  was easiest to have someone standing by the roll the balls into sesame while I formed the balls. You don't want to stuck your dough-y hands in the sesame seeds.]

 
[We used vegetable oil and made sure the temp was at 325 before throwing the sessame balls in to fry.]


Saturday, September 28, 2013

Gourmet Baby Food: Recipe for Turkey with Chestnuts and Apples

I am so excited about finally being able to make something from the Gourmet Bebe cook book. I wanted to make this for Parker a week ago but it took 3 days and 4 grocery stores for me to track down the chestnuts needed for the recipe. Why are pre cooked chestnuts so hard to find? After scouring Sprouts, Vons. Trader Joes and Albertsons, I finally finally found chestnuts at Ranch 99. I was so mad that I couldn't find them and then I remembered that Chinese people love snacking on chestnuts (thanks to my travels in Macau for that tidbit!). Not only did they have cooked chestnuts, they have multiple varieties of ORGANIC chestnuts. Needless to say, I was really effin' happy when I found them. Anyhow, the final product was a delicious puree that Parker scarfs down like nobody's business. I also made Tuan and my SIL try it before I pureed it and they both gave it a thumbs up. See? Pureed meat doesn't have to take bad! Go buy this book. You baby will thank you from saving him from the land of boring, bland baby food.

Turkey with Chestnuts and Apples
Original recipe from Gourmet Bebe by Jenny Carenco

Ingredients
4 apples, washed, peeled and chopped
1 turkey breast, cubed
2 teaspoons of finely chopped shallots
1 teaspoon of sunflower oil
1/2 teaspoon of cinnamon
1/2 teaspoon of grated ginger
1/2 teaspoon of cloves
1 cup of precooked chestnuts


[The ingredients minus the chestnuts because I forgot to include them. Mom fail.]


[Step 1. Wash and peel the apples. Remove the cores and chop the fruit into pieces.]


[Step 2. Brown your chopped up turkey in a saucepan over medium heat with the shallots and sunflower oil.]


[Step 3. Check on your sous chef. Parker is in his new Phil and Ted's Poppy Highchair!]


[Step 4. Add the spices, stirring with the turkey for 1 minute until evenly distributed. Then add chestnuts and apples. Fill pan halfway with water, bring to a boil and lower the heat to simmer for 15 minutes.]


[Step 5. Remove from heat and blend until you have a smooth puree.]


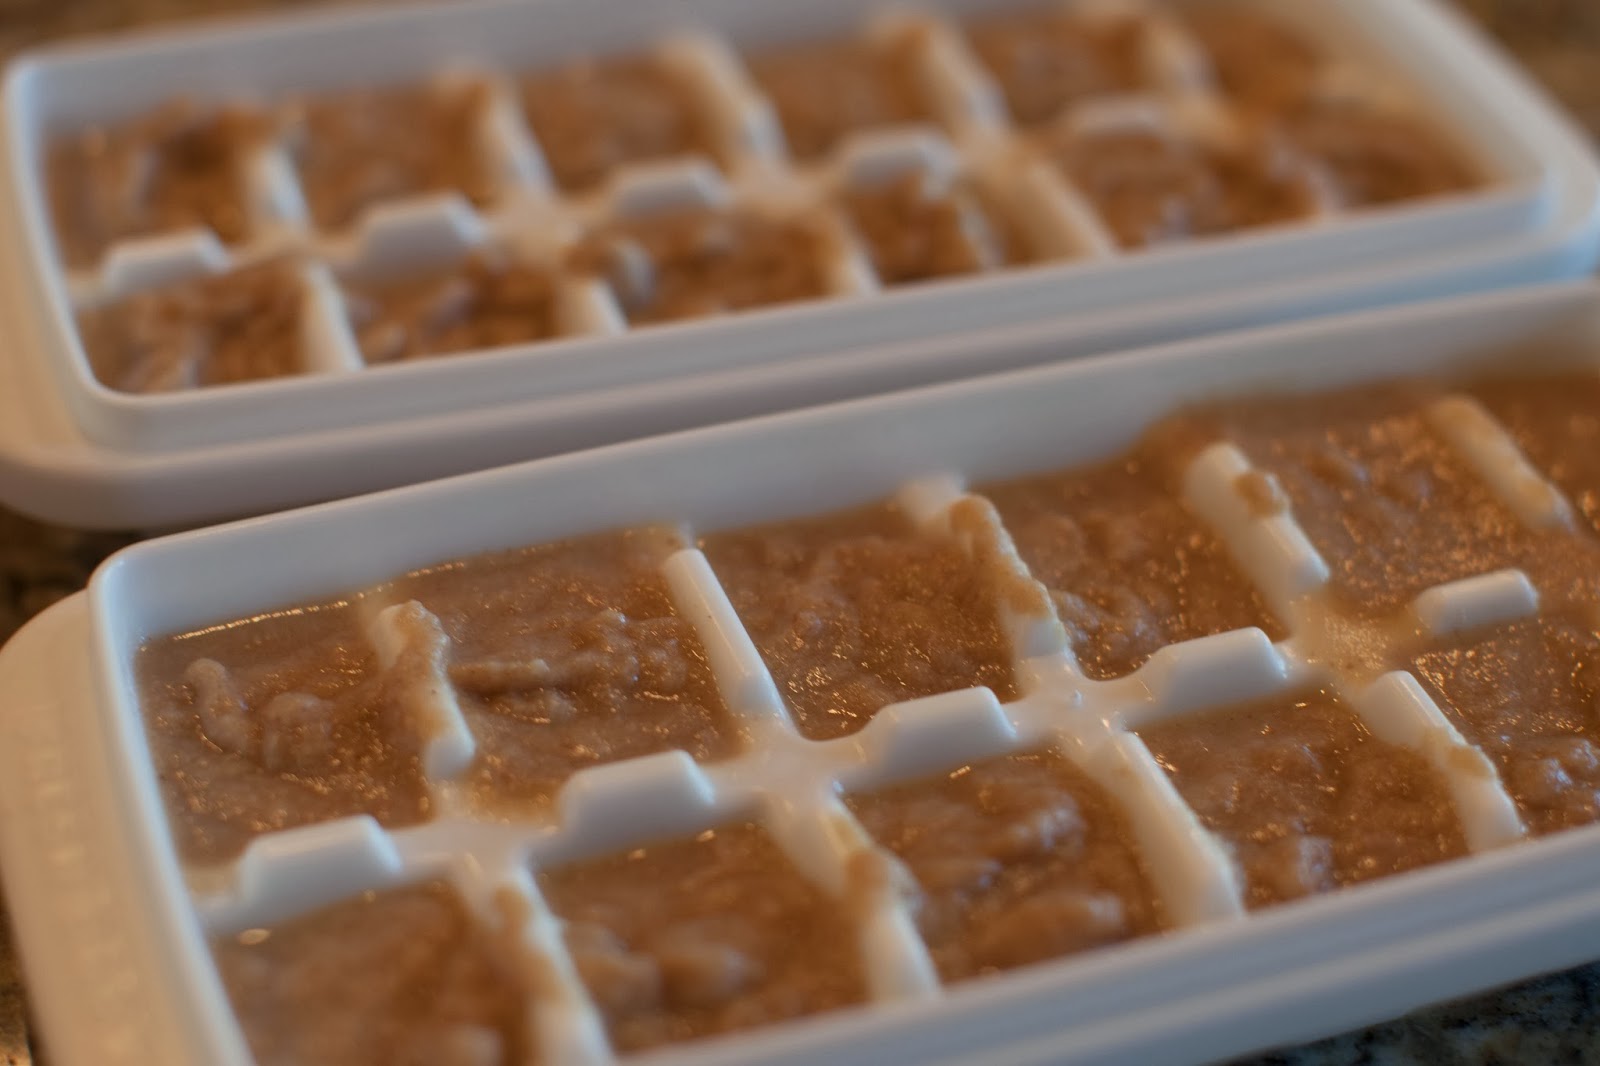
[I fed a bit to Parker for dinner and froze the rest. There was enough for 2 1/2 of these trays. The puree tastes great when reheated. Yum! There could not be a more delectable way to incorporate fall flavors into Parker's baby food.]

Check out this comprehensive list from Baby Got Stuff for more nutritious food ideas for your baby!


Monday, August 5, 2013

When Life Gives you Blackberries, Make Blackberry Jam - Recipe Included

Our good friends the Traftons have some very enterprising children. Apparently wild blackberries grow like weeds around their house in Washington so Sarah, Rachel and Jasper (and their dad, of course) pick the berries and sell them to raise funds for something big. This year, they are raising money to fund a trip to a hotel/waterpark in Washington. Since they were coming to San Diego, I bought $5 worth of blackberries and they were lovingly hand delivered to our house.

The kids suggested that I make their moms AMAZING blackberry banana bread but I didn't have any bananas on hand. Our friend Hoa suggested I make blackberry and fontina grilled cheese sandwiches. I wanted to make blackberry turnovers but could not find pastry sheets for the life of me. So what did I make? Spiced wild blackberry jam. This was my first time making jam and it turned out great! Here is the recipe.

Spiced Wild Blackberry Jam

Ingredients
4 cups of blackberries
1 cup of white sugar
2 tablespoons of corn starch
1/4 teaspoon of cinnamon
1/4 teaspoon of ground all spice
1/2 teaspoon of lemon juice
Jars to store your jam in

Directions
Mash blackberries in a saucepan with a potato masher (or in my case, your measuring cup). 
Stir in sugar until juices form; place about 1 tablespoon blackberry juice in a small bowl and stir in cornstarch. 
Pour cornstarch mixture into saucepan.
Bring berries to a boil, stirring often, until jam is thickened, about 15 minutes. 
Stir in cinnamon and allspice. 
Remove from heat and allow to cool. 
Transfer jam to a bowl, cover, and refrigerate until chilled. 
Stir in lemon juice.
Transfer jam into jars, throw a label on the jars and give away as gifts...because there is no way you can consume all that jam.


[Mashed berries. Looks like I just murdered someone in the saucepan.]


[Reserve 1 tablespoon of berry juice.]


[Add 2 tablespoons of corns starch.]


[Combine the juice and corn starch. Don't be like me and use such a small bowl.]


[The cinnamon and all spice take this jam to the next level.]


[After your jam has cooled and thickened, it should coat a spatula.]


[The final product! I was going to make it all cute and add fabric to the tops but this weekend was crazy and I had no time.]


Originally posted on AllRecipes

Friday, July 26, 2013

Lemon Blueberry Drizzle Bread Recipe

That's it folks. I've finally finished off the Costco blueberries. It started with these Whole Wheat Blueberry Muffins, continued with some uninteresting smoothies and ended gloriously with this amazing lemon blueberry bread recipe. I picked this recipe for three reasons 1. I obviously had too many blueberries 2. I had a couple of lemons left over from when I was sick and drinking lemon water to get better and 3. the story that went along with the recipe. I've done a lot of baking and this recipe is definitely making it to my top 5. Thank you, Pinterest for the great find!


[I made this loaf at 8 PM last night. This morning, I came downstairs and this is all that was left. The bread was a hit!]

Lemon Blueberry Drizzle Bread
Recipe from Good Life Eats

Ingredients
1 1/2 cups all-purpose flour + 1 tablespoon
1 teaspoon baking powder
1/2 teaspoon sea salt
1/2 cup (1 stick) butter, at room temperature
3/4 cup granulated sugar
1 tablespoon lemon zest
3 large eggs
1/2 cup whole milk
1 teaspoon pure vanilla extract
1 cup fresh or frozen blueberries


For the Syrup:
4 tablespoons freshly squeezed lemon juice
4 tablespoons granulated sugar
For the Glaze:
1/2 cup confectioner's sugar
1 tablespoon freshly squeezed lemon juice
*I used a total of 2 large lemons
Directions 
Preheat oven to 350 degrees F (175 C) and place the rack in the middle of the oven. Butter and flour a 9x5-inch loaf pan.
In a small bowl, whisk together 1 1/2 cups of flour, the baking powder and the salt. Set aside.
In a large bowl, cream together the sugar, butter and lemon zest until light-colored, about 3 minutes. Add the eggs, one by one, beating until well mixed before adding the next. Add the milk and vanilla and beat until well blended. Add the dry ingredients and mix just until incorporated.
In a small bowl, gently toss the blueberries with 1 tablespoon of flour. Carefully fold the blueberries into the batter.
Scrape the batter into the prepared loaf pan and bake in preheated oven until a toothpick inserted near the center of the bread comes out clean, about 50-60 minutes. Remove from oven and set on a rack to cool for 5 minutes. Turn the bread out onto the cooling rack.
Meanwhile, make the lemon syrup: in a small saucepan, bring the lemon juice and sugar to a boil. Cook until the sugar has completely dissolved and the syrup has thickened slightly, about 2 minutes.
While the bread is still warm, jab it all over with s skewer. Brush with the lemon syrup. Let the bread cool completely, about 2-3 hours.
To make the glaze: in a small bowl, whisk together the powdered sugar and lemon juice. Add more juice/sugar to gain desired consistency. Drizzle over the cooled bread.
Store bread in the refrigerator (if there is any left to store).

Friday, July 19, 2013

Whole Wheat Blueberry Muffins Recipe

This is going to be part one of "How to use up an entire gigantic package of organic Costco blueberries". I ALWAYS have a hard time finishing the whole package so I don't know why I keep buying it. They just look so good! Anyhow, spent some time on pinterest looking for ideas on how to use them up. At the suggestion of my friend HC, the first thing I made was blueberry muffins. We are keeping it simple.


Whole Wheat Blueberry Muffins (adapted from this recipe on Allrecipes)
Ingredients

Muffin
1 1/2 cups whole wheat flour
3/4 cups of white sugar
1/2 teaspoon of salt
2 teaspoons of baking powder
1/3 cup vegetable oil
1 egg
1/3 cup of milk
1 cup of fresh blueberries

Crumb Topping
1/2 cup brown sugar
1/3 cup whole wheat flour
1/4 cup of butter, cubed
1 1/2 teaspoons of ground cinnamon

Directions
Preheat your oven to 400 degrees F. Line muffin cups with liners.
Combine flour, sugar, salt and baking powder in mixing bowl.
Combine vegetable oil, egg and milk in measuring cup.
Pour wet ingredients into mixer and mix until just combined.
Fold in blueberries.
Fill muffins cups (about 1/4 cup of mix in each muffin).
Mix together all crumb topping ingredients and sprinkle on top of muffins.
Bake for 25 minutes in preheated oven or until done.


[All wet ingredients equal 1 cup]


[Putting too much crumb topping on your muffins will make them sink!]


[Recruit a handsome assistant to distract you from making muffins! Make sure he's secure in his rainforest chair.]


Monday, July 15, 2013

Losing the Baby Weight - A Recipe for Sweet and Green Juice

Today I jumped on the juicing band wagon and made my first batch of green juice! The result was surprisingly delicious and I'm feeling proud of myself for winning this little war against the baby weight. Here's the recipe which I found on Healthful Pursuit. Next time, I'm going to cut back on the celery.

Sweet and Green Juice Recipe

Ingredients
1 pear
1 apple
2 cups of spinach
1 bunch of kale
1 celery stalk
1 cucumber
2 cups of water

Update: I added 2 more apples, 1 pear and cut the amount of celery in half. It's DELICIOUS now.

Directions
Wash and then rough chop all ingredients, removing the cores of the apple and pear, and pulverize in blender with water
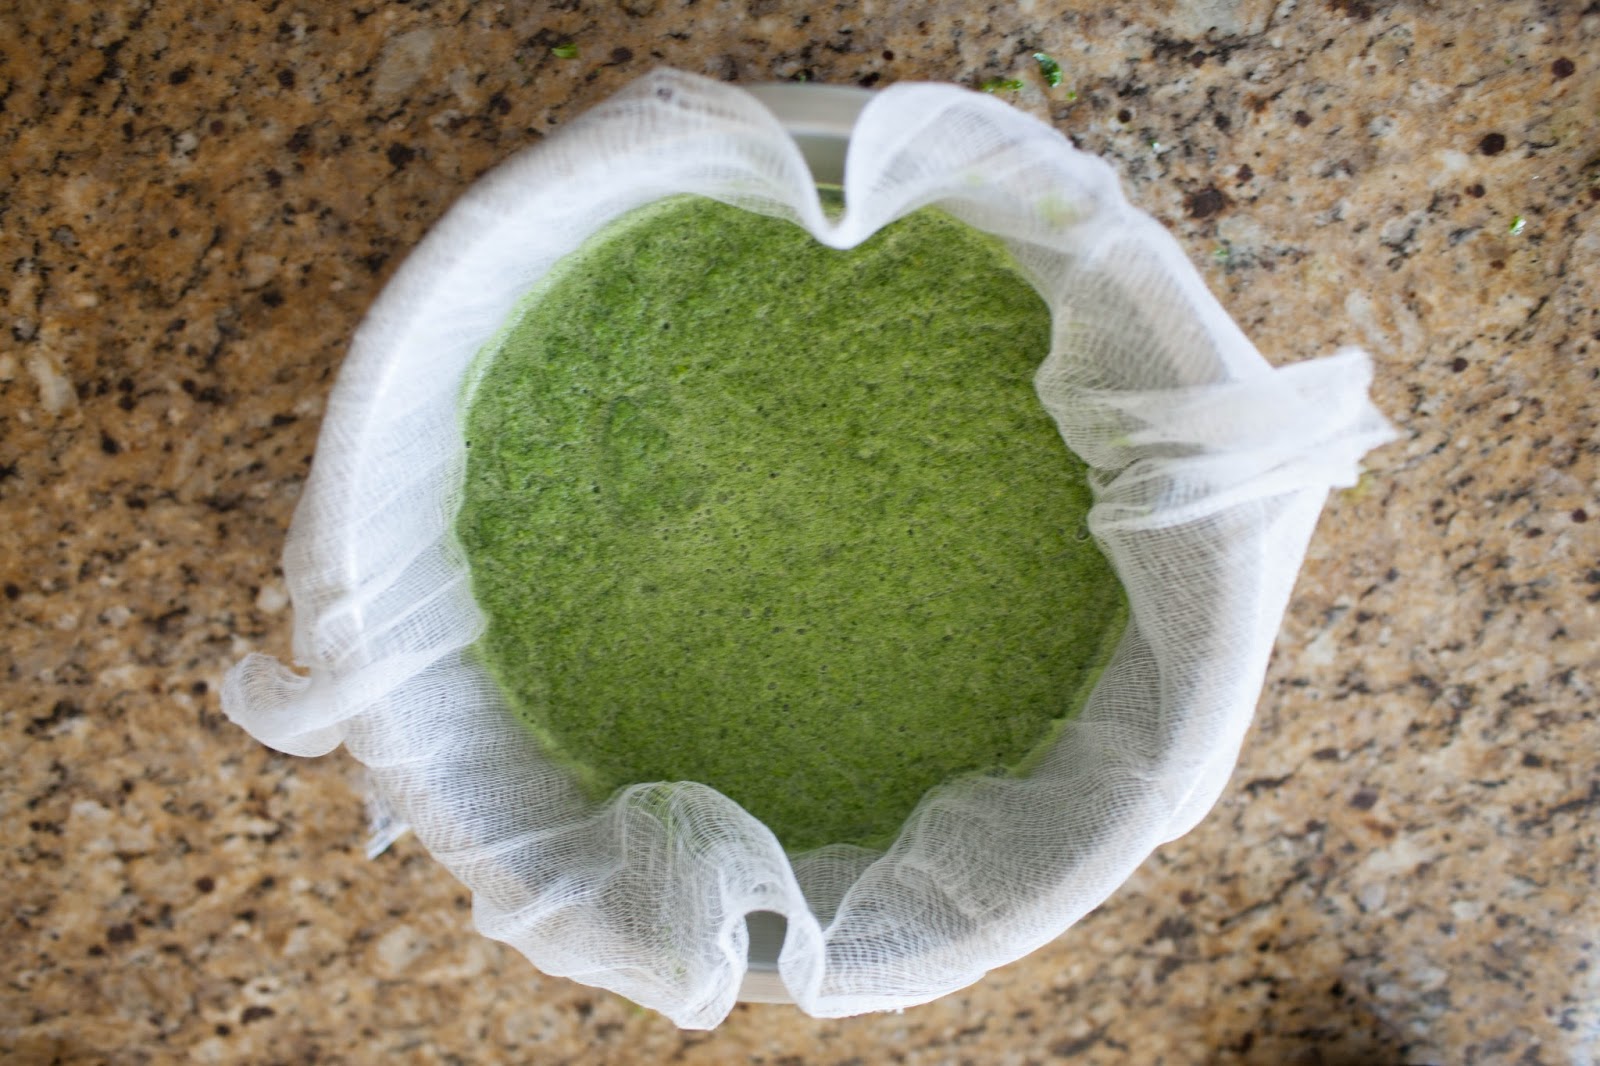
Strain through cheese cloth 
Drink and enjoy! I recommend drinking it cold.

Note: I blended the mix because I don't have a juicer. If you have a juicer, start with the softer veggies first on the low setting - spinach, kale and cucumber. Turn the setting to high and juice the pear, apple and celery.


[So green I can feel it working already!]


[All the chopped ingredients]


[I blended all the ingredients in my Ninja blender]


[Strain everything through a cheese cloth]


[The final product - Sweet and Green Juice]